A step-by-step guide to inviting recipients to your EMI or unapproved option scheme and formalising the option agreement.
Once you have your EMI Valuation, authorised an option pool and designed your EMI option scheme, you're ready to send out EMI option agreements to employees.
Watch our video tutorial or keep reading for step-by-step instructions.
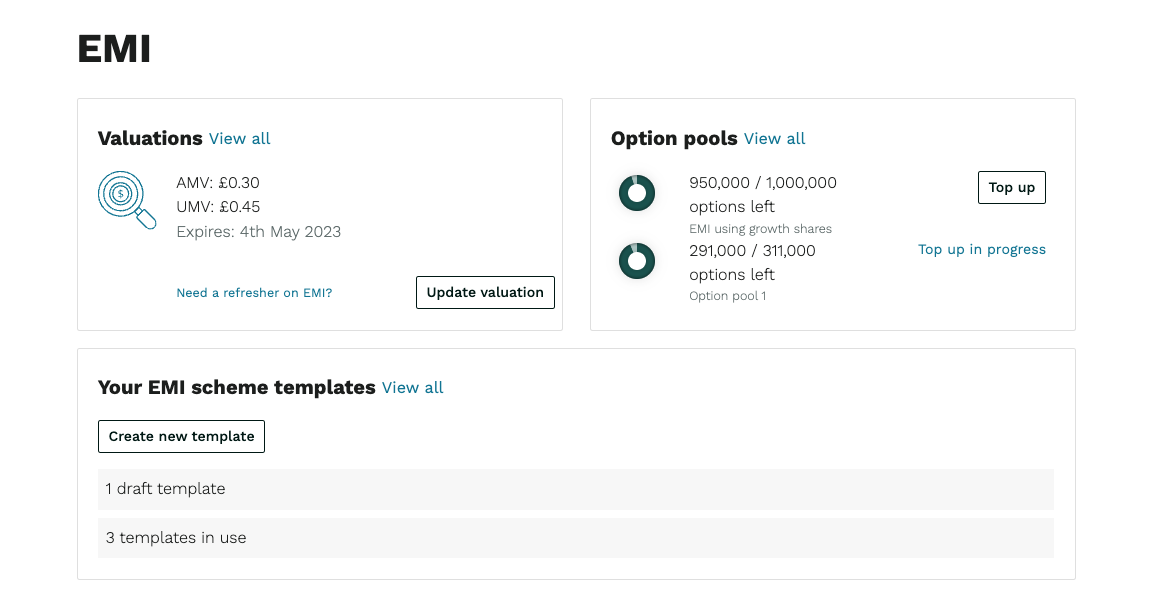
Go to Share schemes > EMI via your side navigation to see your EMI overview page. Your EMI scheme templates is where your schemes live. As you can see in this example we have three templates in use and one in draft.
If you want to add people to an unapproved option scheme, the process is largely the same, except you will begin by going to Unapproved options > View your schemes and issue options. From here, the process is the same, so keep following this help guide.
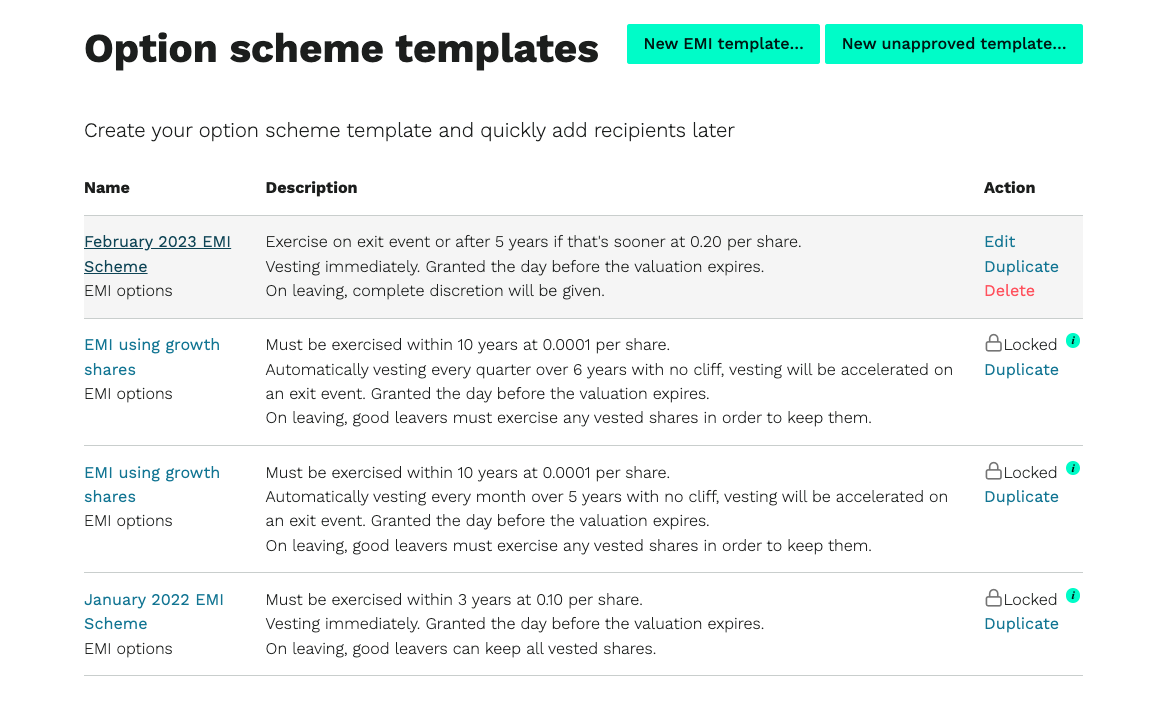
Click View all to see your draft and live templates, and select the template you wish to grant the options from. In this scenario, we're using the draft template February 2023 EMI scheme.
Now it's time to add recipients to the chosen scheme template.
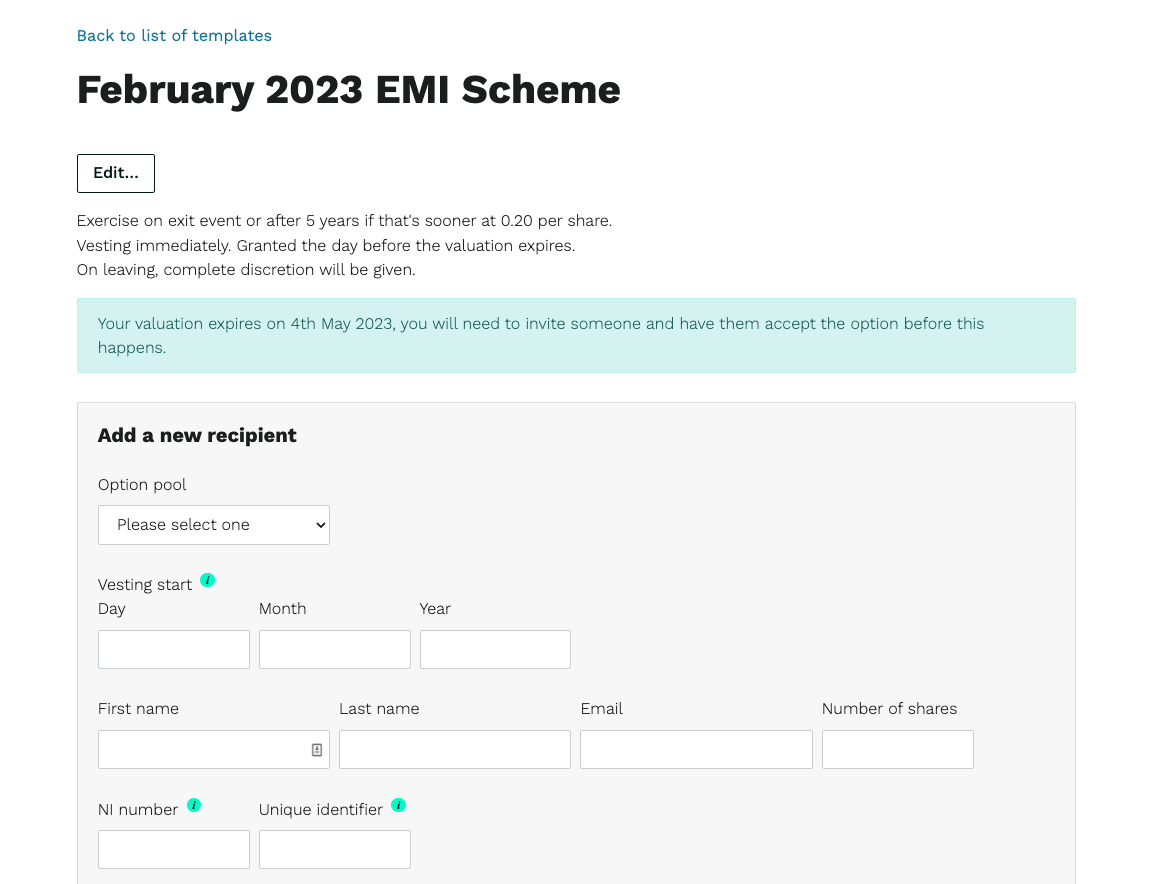
Simply enter a few personal details for each recipient, and if you need a little help with the other fields, here's a brief explanation:
- Option pool: The pool from which the EMI options will be granted.
- Vesting start date: The date that starts the vesting schedule? It can be the grant date, in the past (e.g. when the recipient began employment), or in the future.
- Number of shares: This is the total number of shares the recipient will receive once all options have been exercised.
Once you've entered their details, click Save as draft and add another and repeat until you've added all recipients.
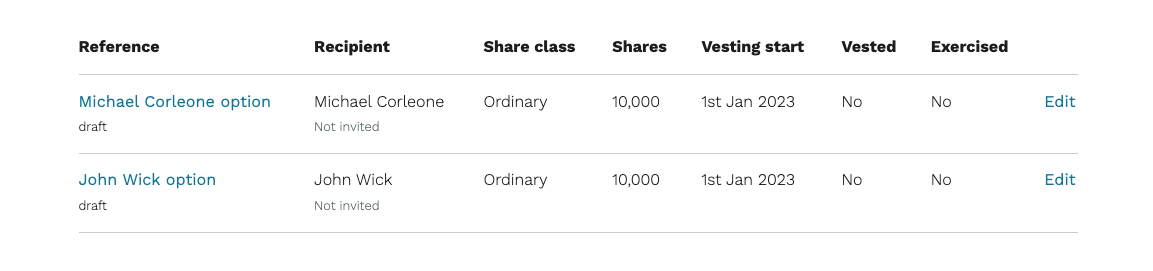
Each recipient will be added to the table below, where you can edit their details if needed.
If you want to add additional criteria unique to one recipient (for example, a sales director must achieve X% growth), click on their name to view their agreement summary. You'll see an Upload criteria link where you can upload a document with the additional details. This will then be added to the recipient's individual agreement.
When everyone has been added, click Send invites to preview the email invite. Each recipient will be invited to join Vestd and accept their option agreement.
Tick the checkbox of each recipient you're ready to invite and click Send invites.
Once an invite has been sent, the option agreement cannot be cancelled, so double-check that everything is correct before sending the invite.
You'll receive an email when each recipient accepts their agreement, and you can view the status of all agreements by going to Share schemes > All option agreements via your side navigation.
That's it, you've set up an EMI scheme and granted EMI options to your employees!
Our team, content and app can help you make informed decisions. However, any guidance and support should not be considered as 'legal or financial advice.'